How to Make a Bolster Pillow Without Piping
A bolster pillow adds elegance and support to any bed, sofa, or armchair, but many tutorials make the process feel complicated with piping cord and advanced techniques. The good news is you can create a beautiful, professional-looking bolster without any piping at all. This guide shows you how to make a bolster pillow without piping using four reliable construction methods suited for every skill level.
You will learn how to measure fabric accurately, choose the right materials, and complete your project with clean finishes and strong seams. Whether you own a sewing machine or prefer a no-sew approach, there is a method here that fits your tools and timeline. By the end, you will have a custom bolster ready to enhance your living space.
Why Bolster Pillows Work Beautifully Without Piping
Piping adds a traditional tailored edge, but skipping it creates a cleaner, more modern aesthetic. Bolsters without piping rely on smart construction techniques like hidden Velcro, hand-gathering, or fabric glue to achieve polished results.
Benefits of a No-Piping Approach
- Faster construction with fewer steps
- Easier for beginners and casual crafters
- Cleaner lines for minimalist or modern décor
- More forgiving for fabric choices and minor measurement errors
Where Bolsters Look Best
Place your finished bolster behind standard pillows on a bed, along the arms of a sofa, or at the back of an armchair. They provide lumbar support and add visual depth to flat surfaces.
Tools and Materials You’ll Need
Gather your supplies before cutting fabric to keep the workflow smooth and accurate.
Cutting and Marking Essentials
- Fabric scissors or a rotary cutter with a cutting mat
- Fabric marker or tailor’s chalk
- Straight pins for alignment
- A round template (a dish, paint can, or bowl) for tracing circles
Sewing Tools (for Sewn Methods)
- Sewing machine with a zipper foot
- Darning needle for hand-stitching
- Upholstery needle for tufting
- Iron for pressing seams flat
Adhesives and Fasteners
- Fabric glue for no-sew seams
- Velcro strips cut 1 inch shorter than your pillow length
- Rubber bands for temporary tying
Measuring and Cutting Fabric Correctly
Accurate measurements prevent puckering, loose fits, and wasted fabric.
Calculate Circumference with the Pi Formula
Use this formula to find the width of your main fabric piece:
Circumference = Diameter × 3.14
For a bolster with a 6-inch diameter, the circumference equals 18.84 inches. Add 1 inch for standard hem allowance or 4 inches if you plan to use a Velcro closure.
Adjust for Seam Allowance
Always add 0.5 inches per side for standard seams. For folded hems, plan for 1 inch total. End cap circles should match the diameter of your pillow form exactly.
Use Household Objects as Templates
Skip the compass and trace circles using a dish, bowl, or paint can that matches your form’s diameter. Test the fit with a paper template before cutting your fabric.
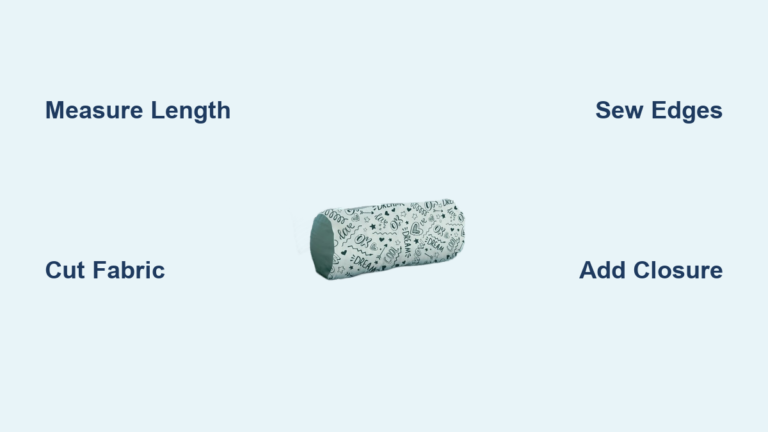
Flat-End Bolster with Velcro Closure

This method creates a removable, washable cover with a hidden closure, perfect for interchangeable styles.
Cut the Fabric Pieces
Cut a rectangle using your calculated circumference plus 4 inches for the Velcro opening. For a 14-inch long bolster with a 6-inch diameter, cut approximately 22.8 inches wide by 14 inches long. Cut two circles matching the diameter of your pillow form for the end caps.
Sew the Velcro Closure
Fold each long edge inward by 0.5 inches, then fold again to hide the raw edge. Press with an iron. Sew one Velcro strip to each folded edge on the interior side, placing the soft side on one edge and the hook side on the other. Ensure they align when closed.
Attach the Circular Ends
Pin one circle to an open end of the fabric tube with right sides facing. Use a zipper foot to stitch close to the edge with a 0.5-inch seam. Clip the seam allowance every 0.5 inches around the curve to prevent puckering. Repeat for the second end, then turn the cover right-side out and insert your pillow form through the Velcro opening.
Gathered and Tufted Bolster Design

This hand-finished style creates decorative gathered ends with optional tufted buttons for a vintage or boho look.
Cut Fabric for Tube and Ends
Cut a main rectangle equal to your bolster length by the calculated circumference. For end pieces, cut two rectangles sized to the radius plus 0.5 inches in height and the full circumference in width. For a 6-inch diameter bolster, each end piece measures about 3.5 inches tall by 18.8 inches wide.
Sew and Turn the Body Tube
Fold the main fabric in half lengthwise with right sides together. Sew along the long edge with a 0.5-inch seam allowance. Turn the tube right-side out and press lightly with an iron.
Gather the Ends by Hand
Insert the pillow form into the tube. At one open end, use a darning needle and upholstery thread to sew a loose running stitch around the raw edge, about 0.5 inches from the edge. Pull the thread tightly to gather the fabric over the pillow end and knot securely. Repeat on the opposite end.
Add Tufted Buttons (Optional)
Cover two buttons with matching fabric. Thread an upholstery needle with a long strand of strong thread and slide one button to the middle. Push the needle through the center of one gathered end, across the entire pillow length, and out the opposite end. Slide the second button onto the thread ends, pull gently to create compression, and secure with a slipknot followed by two firm knots.
Slip-Stitch Closed Bolster (Sewn)

This method produces a seamless, permanently closed bolster ideal for custom stuffing and full control over firmness.
Cut and Sew the Main Tube
Cut fabric to your calculated circumference plus 1 inch for hems, using your chosen length. If adding trim like pom poms, pin it to the short ends now with the finished edge facing inward. Fold the fabric in half with right sides together and sew the long edge with a 0.5-inch seam. Turn right-side out.
Attach the End Caps
Measure the height of the open end and multiply by two to estimate the end cap circumference. Trace and cut two circles slightly larger than needed. Pin one circle to an open end with right sides together and stitch with a 0.5-inch seam, clipping every 0.5 inches around the curve. Repeat on the second end, but only sew halfway to leave an opening for stuffing.
Stuff and Close with a Slip Stitch
Turn the pillow right-side out. Fill with Poly-fil, loose batting, or a rolled towel for firmness, smoothing out lumps as you go. Thread a darning needle with matching thread and use the slip-stitch technique: pick up a tiny fold from each side of the opening, pulling gently after each stitch so the seam disappears into the fabric. Knot securely and trim.
No-Sew Bolster Wrap Method
This quick method requires no sewing machine and produces results in under 30 minutes.
Wrap the Fabric Around the Form
Choose fabric large enough to wrap around your bolster with 6 to 8 inches of excess on each short end. Place the pillow form on the wrong side of the fabric so the right side faces out when wrapped. Roll the fabric tightly around the form, eliminating wrinkles and gaps.
Tie and Secure the Ends
Use rubber bands to tightly tie off the fabric at both ends. Twist the excess fabric into a rope-like fold and secure it flat against the bolster to minimize bulk. Trim any loose threads or excess fabric inside the tied areas.
Glue the Seam and Add Trim
Apply a thin bead of fabric glue along the long edge where the fabric overlaps. Press together and use straight pins to hold it in place while drying for 1 to 2 hours. For a finished look, glue fabric-covered buttons to the center of each tied end. You can also apply Greek key trim or pom poms by measuring 1 inch from the edge of the gathered end and gluing the trim in place.
Choosing the Right Fabric and Filling

Material selection affects durability, comfort, and appearance.
Best Fabric Types
- Decorative cotton or linen for a crisp, clean look
- Vintage fabric or repurposed old clothes for sustainability
- Medium-weight upholstery fabric for high-use areas
Avoid stretchy or overly thin materials, as they will not hold the cylindrical shape.
Filling Options
- Pre-made inserts in polyester or down for easy insertion
- Loose Poly-fil or batting for customizable firmness
- Rolled towels or foam for budget-friendly shape retention
For no-sew and slip-stitch methods, Poly-fil works best for hand-stuffing and even distribution.
Troubleshooting Common Construction Issues
Address problems quickly to keep your project on track.
Ends Won’t Fit Properly
If the circle does not lie flat against the tube, clip the seam allowance every 0.5 inches up to but not through the stitching line. This allows the fabric to ease into the curve smoothly.
Uneven Gathering
Ensure your running stitches are evenly spaced at about 0.5 inches apart before pulling. Pull slowly and adjust fabric folds as you gather to maintain symmetry.
Glued Seam Pops Open
Use straight pins to hold the seam while the fabric glue cures. Avoid moving or using the bolster until the glue has fully set, typically 1 to 4 hours depending on the product.
Tufting Thread Breaks
Use upholstery thread or tufting twine, since regular thread lacks the strength needed. Test tension with a slipknot before final knotting to prevent snapping.
Design and Finishing Touches
Simple details elevate your bolster from basic to beautiful.
Add Decorative Trim
- Pom poms or tassels sewn or glued to gathered ends
- Greek key or tape trim applied 1 inch from the edge with fabric glue
- Contrast binding using a different fabric strip for modern edges
Coordinate with Existing Décor
Use leftover curtain or bedding fabric for a cohesive look. Dark wall colors or plain bedding make bolsters stand out dramatically as accent pieces.
Create a Reversible Cover
Sew two complementary fabrics together for a flip-side design. Ensure both sides share similar weight and care requirements for balanced wear.
Cleaning and Maintaining Your Bolster
Proper care extends the life of your finished pillow.
Cleaning Methods
- Removable Velcro covers can be hand-washed or machine-washed on gentle
- Permanent covers require spot cleaning with mild soap and a damp cloth
- No-sew glue seams should avoid soaking, as moisture weakens adhesive bonds
Restuffing and Repairs
Slip-stitched or tufted bolsters can be reopened and restuffed if they flatten over time. Unpick a few stitches, add more Poly-fil, and resew the opening.
Storage Recommendations
Store in a cool, dry place away from direct sunlight. Avoid stacking heavy items on top and use a cotton bag to prevent dust buildup during long-term storage.
Frequently Asked Questions About Making a Bolster Pillow Without Piping
Can I make a bolster pillow without a sewing machine?
Yes. The no-sew wrap method uses fabric glue and rubber bands to create a finished bolster in under 30 minutes. You only need fabric, glue, and a pillow form.
What fabric works best for bolster pillows?
Medium-weight cotton, linen, or upholstery fabric holds shape well and provides durability. Avoid stretchy knits or very thin fabrics that lose structure over time.
How do I calculate the right fabric size?
Multiply the pillow form’s diameter by 3.14 to get the circumference. Add 1 inch for standard hems or 4 inches for Velcro closures. The length of the fabric equals your desired pillow length.
What can I use instead of pillow stuffing?
Poly-fil and polyester batting offer the most even distribution. You can also roll an old towel to match the target diameter for a budget-friendly core filler that maintains shape during construction.
How do I keep circular ends from puckering?
Clip the seam allowance every 0.5 inches around the curve before turning the cover right-side out. This technique allows the fabric to ease smoothly around the rounded edge.
Can I add trim without sewing it on?
Yes. Apply decorative trim like Greek key tape or pom poms using fabric glue. Measure 1 inch from the edge of the gathered end and press the trim firmly into the glue until set.
Final Thoughts on Creating a Custom Bolster Pillow
Learning how to make a bolster pillow without piping opens the door to custom décor that fits your style and budget. The four methods covered here offer flexibility for every skill level, from quick no-sew wraps to polished sewn covers with hidden Velcro closures.
Focus on accurate measurements, quality fabric, and even stuffing distribution for the best results. Clean seams and secure closures ensure your bolster holds its shape through years of use. Pick up your tools, choose your favorite method, and start crafting a bolster that adds both comfort and character to your home today.