How to Clean Sleep Apnea Mask
Your sleep apnea mask collects facial oils, sweat, and bacteria every single night you use it. Ignoring this buildup leads to skin irritation, persistent leaks, and reduced therapy effectiveness.
This guide details the exact daily and weekly steps to clean your equipment safely. You will learn the right soap to use, how to disinfect with vinegar, and which products to avoid.
Daily Mask Cleaning Routine for Seal Integrity

Cleaning your mask cushion every day removes the oils that break down silicone. This simple habit prevents air leaks and keeps your skin clear of acne or rashes.
Wash Cushion with Mild Dish Soap
Use warm water mixed with a few drops of mild dish soap like Ivory to clean the cushion. Avoid liquid hand soaps because they contain moisturizers that leave a greasy film. Gently rub the silicone with your fingers or a soft cloth to remove residue. Focus on the areas that touch your nose and forehead where oil accumulates fastest.
Rinse and Air Dry Without Wiping
Rinse the cushion under clean running water until no soap suds remain. Place the part on a clean towel to air dry completely before your next use. Never wipe the silicone dry with a towel because lint fibers will stick to the surface. These fibers create tiny gaps that cause air leaks and skin irritation during therapy.
Empty Humidifier Chamber Each Morning
Empty any remaining water from the humidifier chamber immediately after waking up. Standing water promotes bacterial growth and can spill into the machine if you move it. Rinse the chamber with warm water and let it air dry before refilling. Always use distilled water to prevent mineral deposits that cloud the plastic.
Weekly Deep Cleaning Protocol for Disinfection
A weekly deep clean kills bacteria and mold that daily washing might miss. This process ensures your entire system remains hygienic and odor-free.
Soak Components in Vinegar Solution
Mix a solution of two parts white vinegar to three parts water in a clean basin. Submerge your mask frame, cushion, and tubing in this mixture for exactly 30 minutes. This specific ratio effectively kills common pathogens without damaging the medical-grade materials. The acid in the vinegar also helps dissolve mineral scale and eliminates musty smells.
Wash All Parts with Mild Detergent
Remove the parts from the vinegar bath and wash them again in warm soapy water. This second wash removes any loosened debris and ensures no vinegar taste remains. Pay close attention to crevices in the mask frame and the interior of the tubing. Use a soft brush if necessary but avoid abrasive scrubbers that scratch the plastic.
Rinse Thoroughly and Hang to Dry
Rinse every component under clean water to remove all traces of soap and vinegar. Hang the tubing vertically on a drying rack or clothesline to let water drain completely. Lay the mask and headgear flat on a clean towel in a well-ventilated area. Ensure every part is bone dry before reassembling to prevent mold growth.
Headgear Cleaning to Prevent Skin Irritation
Your headgear straps absorb sweat and hair oils that degrade elasticity over time. Proper cleaning keeps the straps comfortable and prevents forehead breakouts.
Remove and Wash Monthly or as Needed
Take the headgear off the mask frame before attempting to clean it. Wash the straps once a month or weekly if you have oily skin or sweat heavily at night. You can hand wash them in a sink or place them in a mesh laundry bag for a machine cycle. Using a bag prevents the straps from tangling with other items or stretching out.
Use Only Mild Laundry Detergent
Select a mild laundry detergent for washing your headgear straps safely. Never use fabric softener, bleach, or alcohol-based cleaners on the fabric. These harsh chemicals break down elastic fibers and leave residues that irritate your skin. Hot water is also prohibited as it can shrink the material and ruin the fit.
Air Dry Away from Direct Heat
Always allow your headgear to air dry naturally without using a clothes dryer. Heat destroys the elasticity of the straps and shortens their usable lifespan significantly. Lay the straps flat or hang them in a shaded area with good airflow. Direct sunlight weakens the fabric and causes colors to fade over time.
Tubing Cleaning to Stop Mold Growth
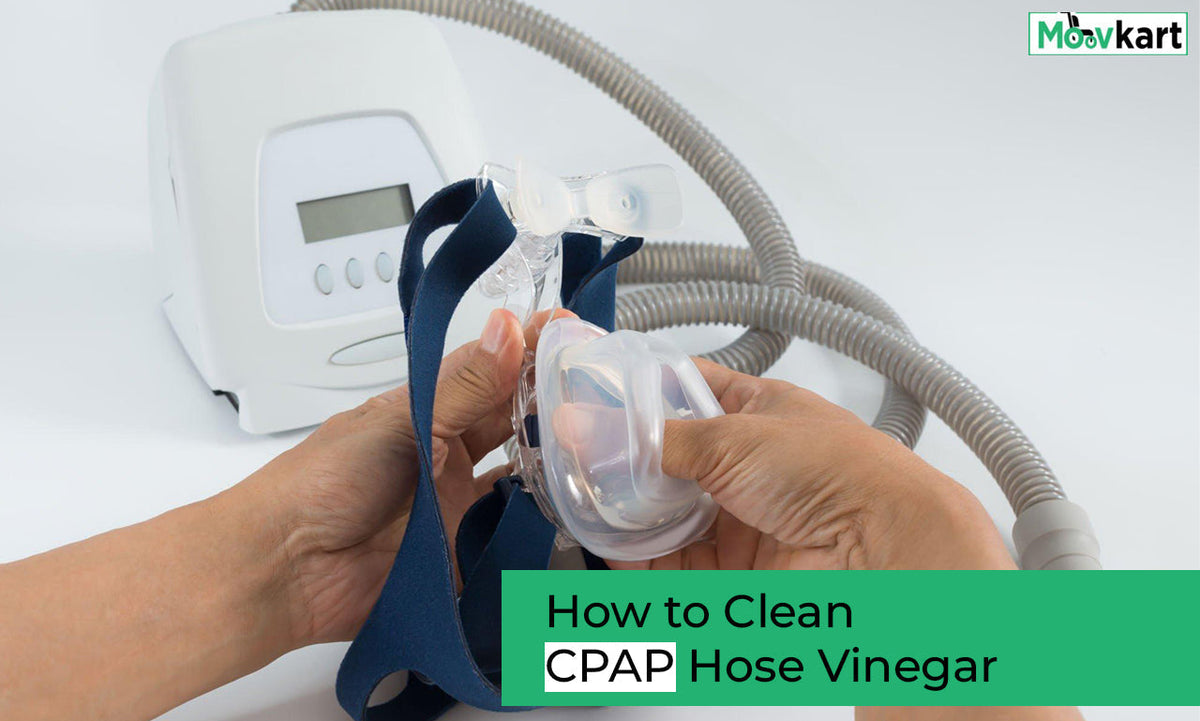
CPAP tubing traps moisture from your breath and the humidifier, creating a perfect environment for mold. Regular cleaning keeps your airway clear and your breathing safe.
Wash Every Few Weeks with Warm Water
Clean your tubing every one to two weeks using warm water and mild dish soap. Detach the tube from both the machine and the mask before washing. Use a bottle brush to gently scrub the inside if you see visible buildup. Rinse the tube thoroughly because leftover soap can cause throat irritation or coughing.
Disinfect Weekly with Vinegar Soak
Soak the tubing in the two-to-three vinegar solution once a week for disinfection. This step kills microbes living inside the tube and removes stale odors. After soaking, rinse the tube well and hang it vertically to drain. Never store the tubing while water is still pooling inside the curves.
Avoid Bleach and Commercial Wipes
Never use bleach, alcohol, or disinfectant wipes on your CPAP tubing. These chemicals degrade the plastic and silicone, making the tube brittle and prone to cracking. They can also leave behind toxic residues that you inhale directly into your lungs. Stick to mild soap and vinegar for safe and effective cleaning.
Humidifier Chamber Maintenance Schedule
The water chamber requires specific care to prevent mineral buildup and bacterial colonies. Following this schedule ensures you breathe clean, moist air every night.
Empty Water Every Single Morning
Empty unused water from the chamber every morning before moving your machine. Leaving water sitting encourages rapid bacterial growth and increases leak risks. Rinse the chamber with warm water and let it dry before the next fill. This simple step prevents biofilm formation inside the tank.
Clean Weekly and Disinfect Monthly
Wash the chamber with mild soap and water on a weekly basis. Once a month, perform a deep disinfecting soak using the vinegar solution for 30 minutes. This monthly treatment removes stubborn mineral scale and biofilm that regular washing misses. Rinse extremely well until no vinegar scent remains.
Refill with Distilled Water Only
Always fill your humidifier with distilled water rather than tap water. Tap water contains minerals that build up quickly, making the chamber cloudy and difficult to clean. Distilled water reduces the risk of inhaling airborne minerals during your therapy session. It also extends the life of your humidifier chamber significantly.
Filter Care and Replacement Timelines
Filters protect your machine motor and ensure the air you breathe is free of dust. Ignoring filter maintenance reduces airflow and strains the device.
Rinse Washable Gray Filters Weekly
If your machine uses gray foam filters, rinse them in plain water once a week. Gently squeeze out excess moisture and let them air dry completely before reinstalling. Never run the CPAP machine with a wet filter installed. Moisture inside the machine can damage internal electronic components.
Replace Disposable White Filters Monthly
Replace white disposable filters every 30 days regardless of how clean they look. These filters capture fine particles and lose effectiveness over time. If a filter looks gray or dusty before the month ends, replace it immediately. Fresh filters ensure optimal air quality and machine performance.
Check Back Panel Filter Every Two Months
Inspect the filter located on the back of your device every one to two months. Look for dust accumulation, holes, or clogs that restrict airflow. Replace this filter every four to six months or sooner if damaged. Always reattach the filter cover securely to prevent dust from entering the machine.
When to Replace Worn Components
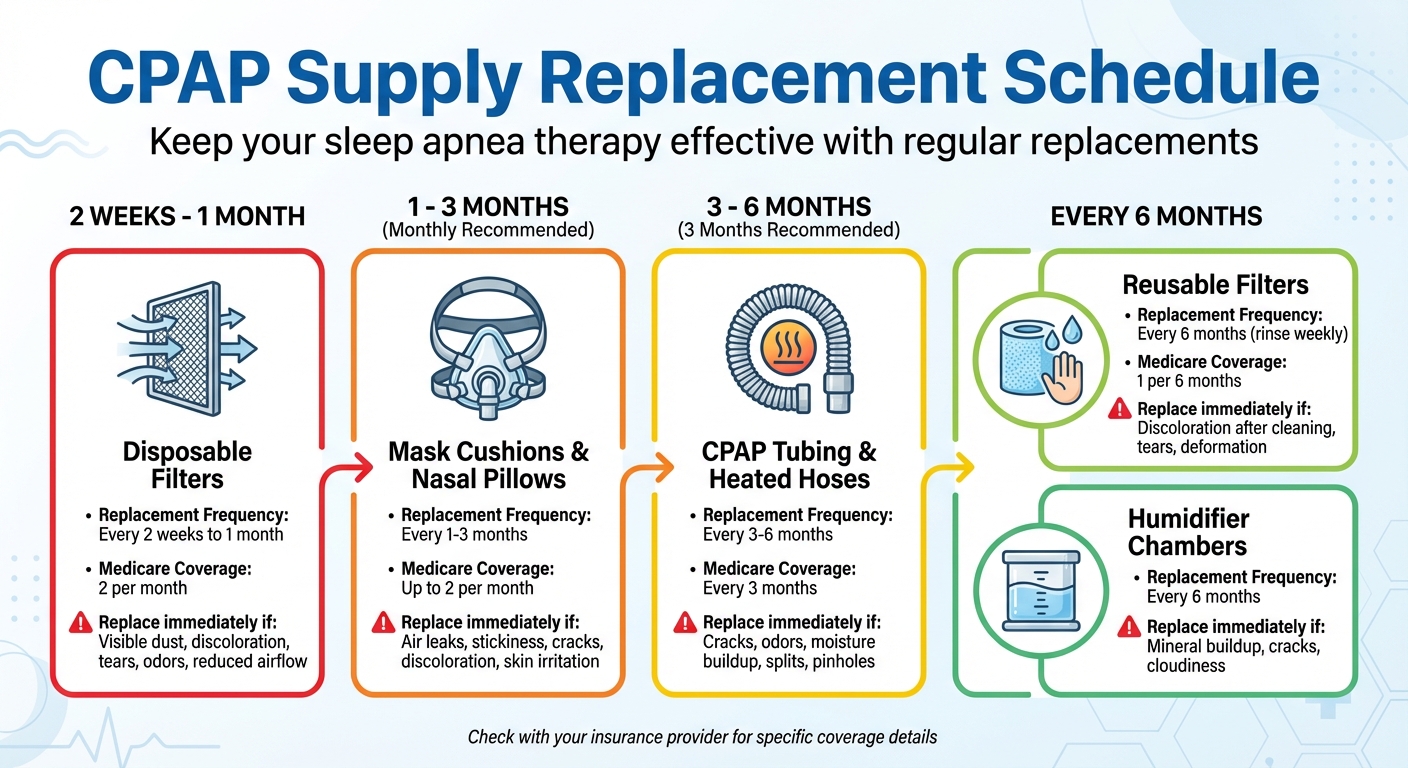
Even with perfect cleaning, CPAP parts wear out and lose effectiveness. Replacing them on schedule ensures your therapy remains comfortable and successful.
Replace Mask and Headgear Every 6 to 12 Months
Change your mask and headgear every six to twelve months depending on wear. Look for cracks in the cushion, stiff silicone, or frayed straps as signs of aging. Old silicone loses flexibility, causing pressure sores and air leaks. Persistent leaks despite adjustments usually mean it is time for a new mask.
Change Tubing Every 1 to 2 Years
Replace your air tubing every one to two years or sooner if damaged. Discard tubing that is discolored, cloudy, or has a persistent bad smell. Cracks or stiffness in the plastic indicate the material is breaking down. Worn tubing can harbor bacteria that cleaning cannot fully remove.
Swap Humidifier Chamber Every 1 to 3 Years
Replace the humidifier chamber if it becomes cloudy, scratched, or cracked. Mineral buildup that will not wash away is another sign replacement is needed. A damaged chamber can leak water into the machine or release microplastics. Regular inspection helps you catch these issues before they affect your health.
Dangerous Products to Avoid During Cleaning
Using the wrong cleaning agents can ruin your equipment and harm your health. Stick to manufacturer-recommended supplies to ensure safety.
Never Use These Harmful Substances
Avoid using bleach, alcohol, or fabric softener on any CPAP parts. These substances degrade silicone and plastic while leaving toxic residues. Liquid hand soap and dishwashers are also prohibited due to heat and oil content. Direct sunlight and hot water will warp and weaken your equipment quickly.
Stick to Safe Cleaning Agents
Use only mild dish soap, warm water, and white vinegar for cleaning. These items are safe, effective, and recommended by device manufacturers. They clean thoroughly without damaging the delicate materials of your mask and tubing. This simple trio is all you need for a hygienic system.
Special Protocols for Infections and Illness

Adjust your cleaning routine when you are sick to prevent reinfection or spreading germs. Specific protocols apply depending on your symptoms.
Disinfect Daily for Clear Nasal Drainage
Increase disinfection frequency to daily if you have a cold with clear mucus. Use the vinegar solution every day to kill bacteria and viruses in the system. This prevents you from reinfecting yourself with germs trapped in the mask. Continue this routine until your symptoms fully resolve.
Pause CPAP for Sinus Infections
Stop using your CPAP for a few nights if you have a bacterial sinus infection. This applies especially if you have thick yellow or green drainage and are on antibiotics. Forcing air into infected sinuses can worsen symptoms or push bacteria deeper. Resume therapy once drainage clears and you feel better.
Storage and Travel Best Practices
Proper storage protects your investment from damage and contamination when not in use. Good habits extend the life of your equipment.
Store in a Clean Dry Location
Keep your mask and tubing in a clean, dry area away from dust and pets. Avoid storing equipment in bathrooms where humidity encourages mold growth. Use a dedicated storage bag or case to keep parts organized and protected. A clean environment ensures your next use starts hygienically.
Use Protective Cases for Travel
Always use a dedicated CPAP travel case when taking your machine on trips. This case shields your equipment from dirt, impact, and spills during transit. Ensure all parts are completely dry before packing them away. Damp components stored in a case will grow mold rapidly.
Frequently Asked Questions About Cleaning Sleep Apnea Masks
Can I use baby wipes to clean my CPAP mask?
No, you should not use baby wipes or commercial disinfectant wipes on your mask. These wipes often contain lotions or alcohols that degrade silicone and leave residues. Stick to mild dish soap and water for safe daily cleaning.
How often should I soak my mask in vinegar?
You should soak your mask, tubing, and chamber in a vinegar solution once a week. This weekly disinfection kills bacteria and removes odors effectively. For the humidifier chamber, a monthly soak is sufficient unless you are sick.
Is it safe to put my CPAP headgear in the washing machine?
Yes, you can machine wash headgear if you place it in a mesh laundry bag first. Use a gentle cycle with mild detergent and avoid fabric softener. Always air dry the straps and never use a clothes dryer.
What happens if I use tap water in my humidifier?
Using tap water causes mineral buildup that clouds the chamber and is hard to clean. It can also release minerals into the air you breathe, irritating your lungs. Always use distilled water to prevent these issues.
How do I know if my CPAP tubing needs replacing?
Replace your tubing if it looks cloudy, feels stiff, or has cracks. A persistent bad smell even after cleaning also indicates it is time for a new tube. Most users replace tubing every one to two years.
Key Takeaways for How to Clean Sleep Apnea Mask
Proper maintenance of your sleep apnea mask requires a daily wash with mild soap and a weekly disinfecting soak. Avoiding harsh chemicals like bleach and alcohol protects the silicone seal and ensures your safety. Replacing worn components on schedule keeps your therapy effective and comfortable.
Start your new cleaning routine tonight by gathering mild dish soap and white vinegar. Consistent care extends the life of your equipment and protects your respiratory health.