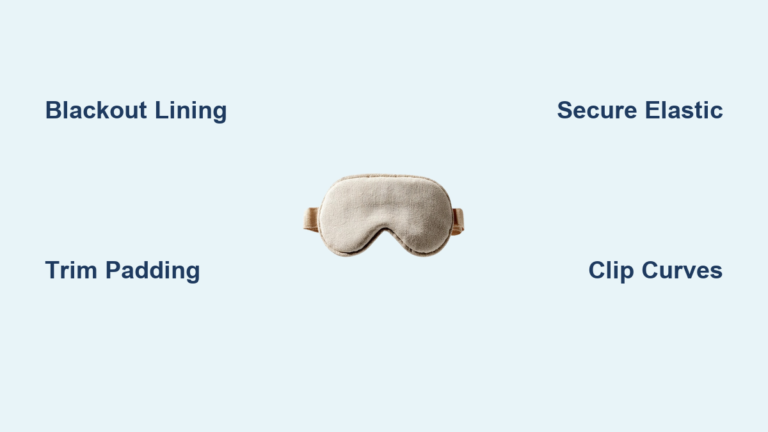
How to Make a Sleep Mask: Quick Steps
Struggling to sleep in a bright room or needing relief from screen glare before bed? A custom sleep mask could be your solution, and learning how to make a sleep mask is easier than you might think. Whether you are a beginner with a sewing machine or crafting by hand, this guide shows you how to build a mask that blocks light, feels soft on your skin, and fits perfectly.
We will walk through three proven methods including a standard elastic-back design, a premium light-blocking version, and a quick tie-strap alternative. From choosing the right fabrics to finishing with a clean edge, you will have a comfortable and durable sleep mask in as little as 15 minutes.
Choose the Right Materials for Maximum Darkness
Selecting the correct fabrics determines how well your mask blocks light and feels against your skin. The right combination ensures comfort while preventing any light leakage that could disturb your rest.
Pick Light-Blocking Outer Fabric
Start with dark-colored cotton fabric for the outer layer since darker shades block more light than white or light prints. You can use leftover quilting cotton or repurpose fabric from old clothes to keep the project eco-friendly. A piece measuring about 5×7 inches is sufficient for one adult-sized mask.
Select a Soft Breathable Lining
Comfort matters most against your skin so choose minky, flannel, fleece, or soft cotton for the backing. Minky adds plush warmth which is ideal for winter, but you should pair it with breathable cotton on top to avoid overheating. Lightweight flannel offers softness without trapping heat, making it perfect for year-round use.
Add Structure With Fusible Fleece
Include one-sided fusible fleece on the wrong side of the outer fabric to boost light blocking capabilities. This material adds density without stiffness, and you can iron it on in 10-second bursts using a pressing cloth to prevent scorching. Alternatively, use cotton batting for a lighter feel or double the batting for extra thickness in very bright environments.
Prepare the Right Elastic or Ties
You need the correct strap length to ensure a snug and adjustable fit for your head size.
* Use 13½-inch elastic that is ¼” wide for a fixed strap.
* Choose 16–18 inches of fold-over elastic (FOE) for stretch and comfort.
* Cut two 12-inch fabric ties for a no-elastic option.
Ensure you shorten the strap for kids or lengthen it for larger heads as needed.
Gather Essential Tools Before You Start
You do not need advanced gear to create a professional-looking sleep mask. Having the right equipment ready will make the process smoother and faster.
Basic Sewing Equipment Checklist
- Scissors or rotary cutter for clean cuts
- Pins or fabric clips to prevent shifting with thick layers
- Sewing machine or needle for hand sewing
- Iron and board for fusing and pressing
- Bodkin, safety pin, or chopstick for turning straps
Download and Prepare the Pattern
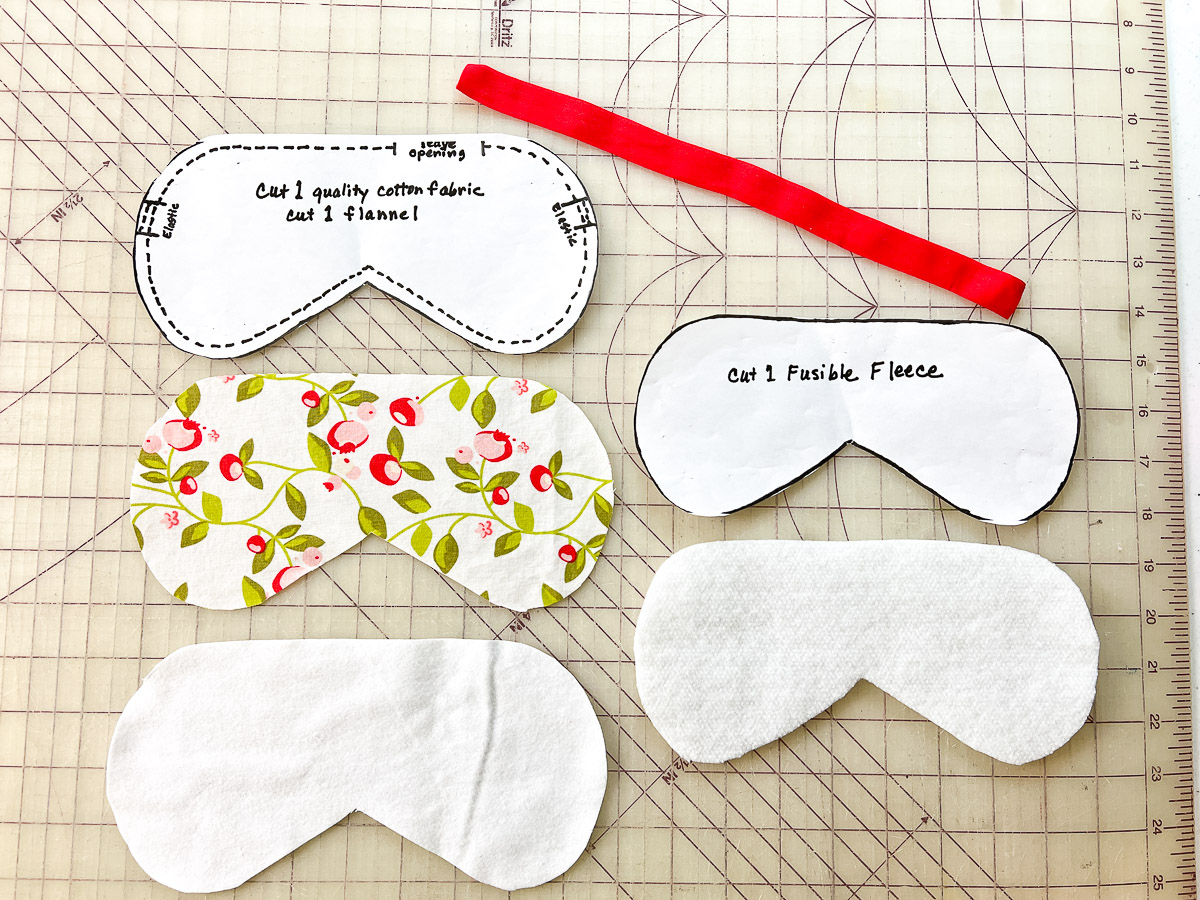
Find a free printable sleep mask PDF pattern online that includes both adult and child sizes. Print the pages, tape them together, and cut out your specific size before tracing it on the wrong side of the fabric. Mark the slit points on the sides where the elastic will go to ensure proper alignment during assembly.
Cut Fabric Layers Accurately for a Clean Fit
Precise cutting prevents misshapen masks and ensures all layers align perfectly during sewing. Follow these steps to prepare your fabric pieces correctly.
Fuse Fleece to Outer Layer
Bond fusible fleece to the back of the outer fabric for maximum darkness and structure.
1. Place the rough side of the fleece against the wrong side of the cotton.
2. Cover with a scrap fabric or pressing cloth to protect surfaces.
3. Press with a hot iron for 10 seconds at a time, moving across until fully adhered.
Cut Front and Back Pieces
Place your pattern on the fused outer fabric with the wrong side up and trace the shape. Place the same pattern on the lining fabric and cut a matching piece for the back. If using batting, cut one layer slightly smaller than the mask shape to reduce bulk inside the final product.
Cut the Strap for Internal Elastic
If you are using an internal elastic strap, fold a 2½” x 14″ fabric strip in half with right sides together. Sew along the long edge with a ¼” seam allowance and turn it right side out. Press it flat so the seam lies perfectly in the center before adding elastic.
Assemble With Internal Elastic for Standard Comfort
This method creates a clean finish with hidden elastic that is perfect for standard daily use. It offers a professional look with minimal visible hardware.
Thread and Secure the Elastic
Use a bodkin or safety pin to thread the 13½-inch elastic through the fabric strap tube you created. Pull both ends out and backstitch 3–4 times at each end to lock the elastic in place. This step prevents slippage during use and ensures the mask stays secure on your head.
Sandwich All Layers Together
Place the front and back fabric right sides together and insert the strap ends between them. Align the strap ends with the side notches you marked earlier and lay batting on top with the fabric side down. Clip or pin all layers securely, which is especially important when working with thick batting.
Sew and Leave a Turning Gap
Sew around the entire mask with a ¼-inch seam allowance but stop 1–2 inches from completing the circle. Leave this opening to turn the mask right side out later. Use a consistent stitch length and backstitch at the start and end for strength.
Build a Light-Blocking Mask With Fold-Over Elastic

This premium method uses fold-over elastic (FOE) to create superior fit and maximum light blocking. It is ideal for those who need total darkness to sleep.
Attach Fold-Over Elastic Correctly
Lay the front fabric right side up and position ¼” fold-over elastic over the slit points with the shiny side down. Extend the elastic 1/8″ beyond the fabric edge on both sides to ensure even tension. This placement creates a smooth curve around the ears for a comfortable fit.
Layer and Pin With a Gap
Place the back fabric right side down over the front to sandwich the elastic ends inside. Pin around the edges but leave a 3-inch gap at the top for turning. Mark this gap clearly with clips so you do not sew over it during the next step.
Sew Trim and Clip Curves
Sew around the perimeter with a ¼-inch seam using short stitches on curves like the nose bridge. After sewing, trim the seam allowance and clip into curved areas to help the mask lie flat when turned. Be careful not to cut the stitches while trimming.
Make a Quick Tie-Strap Mask for Beginners
This rapid-assembly variation is ideal for beginners or fast gifts since it requires no elastic. You can complete this version in just 10 to 15 minutes.
Sew Three Sides Only
Cut two 5×7 inch rectangles for the outer and lining layers. Place them right sides together and pin the edges before sewing along three sides with a ¼” seam. Leave one short end completely open so you can turn the mask right side out through this opening.
Attach Fabric Ties Securely
Cut two 12-inch ribbons or fabric strips to serve as ties. Position one at each side corner where ears would be and pin them in place. Backstitch securely to attach them, allowing you to tie the mask behind your head for a custom fit without elastic.
Turn and Finish the Mask Professionally
Proper turning and pressing give your sleep mask a polished look that rivals store-bought versions. Take your time during this stage for the best results.
Push Out Corners Carefully
Use a chopstick or point turner to gently push out the nose and eye corners of your mask. Work slowly to avoid poking holes through the fabric or seams. If you are using minky or plush linings, avoid sharp tools as they can pull fibers and damage the pile.
Press for a Crisp Shape
Iron the mask flat while focusing on the cotton side to create crisp edges. If using minky, never press directly on the plush surface but instead use a pressing cloth or iron only the outer layer. This keeps the backing soft and prevents melting synthetic fibers.
Close the Opening Neatly for Durability
Closing the turning gap properly ensures your mask lasts through many washes and uses. A clean finish also improves the overall aesthetic of your handmade item.
Fold and Stitch the Gap
Insert your fingers into the turning gap and pull the raw edges inward to create a clean fold. Pin the seam shut while matching the curve precisely before sewing close to the edge with a straight stitch. Use dark thread to blend in with the seam or contrast thread for a decorative look.
Topstitch for Durability and Polish
Topstitching reinforces the edges and gives your sleep mask a professional appearance. This final step secures the opening and flattens the inner seam.
Reinforce the Edges
Topstitch around the entire mask with a 1/8-inch seam allowance to flatten the inner seam and secure the opening. As you sew, gently push the elastic or FOE out of the way to avoid stitching through it, which preserves elasticity. For a decorative touch, use contrast thread or double topstitch for a professional finish.
Optimize Fit and Darkness for Better Sleep

Even the best fabric will not help if light leaks in, so smart design choices are essential. Focus on fit and material density to maximize the effectiveness of your sleep mask.
Block Light With Smart Design
Prevent light leaks by using dark inner layers and adding fusible fleece for thickness. Ensure the mask hugs the nose bridge by accurately clipping curves during construction. Avoid gaps at the sides by adjusting elastic length, as a fit that is too loose allows light to sneak in.
Adjust for Comfort and Breathability
Choose breathable linings like cotton or bamboo to reduce sweating during sleep. For sensitive skin, use undyed organic fabrics to prevent irritation. If you wear glasses or contacts, ensure the mask does not press on your eyes by adding a bit more depth with extra batting.
Customize Your Design for Style
Make your sleep mask unique by adding personal touches that reflect your style. Customization also makes these masks excellent gifts for friends and family.
Add Personal Style Elements
You can embroider initials or small stars onto the outer fabric for a personal touch. Use fabric paint to create constellations or moons, or sew on appliqué shapes like clouds or cats. Match patterns to pajamas or create themed sets for travel to make bedtime more fun.
Create Gift Sets
Make multiple masks in coordinating fabrics to create thoughtful gift sets. Package them in a linen bag with a sleep tea sample or essential oil roller for a complete relaxation kit. Label the package with “Handmade for Better Sleep” to add a special touch to your gift.
Troubleshoot Common Problems
Addressing common issues during construction ensures your final product looks and functions perfectly. These tips help you avoid frustration and fix mistakes quickly.
Fix Wrinkled or Wavy Fabric
Always press fabric before cutting because wrinkles distort the pattern and lead to misshapen masks. Use a wool pressing mat and medium-hot iron to smooth seams without flattening minky or plush fabrics.
Prevent Bulky Seams
Thick layers can cause lumps, so clip curved seams up to the stitching line without cutting through it. This allows the fabric to spread when turned, which is essential at the nose bridge for a smooth contour.
Stop Elastic from Slipping
Reinforce elastic ends with multiple back-and-forth stitches to keep them secure. If using FOE, make sure it is caught securely in the seam on both sides and test the stretch before finalizing the project.
Maintain and Care for Your Mask
Proper care extends the life of your sleep mask and keeps it hygienic for nightly use. Follow these guidelines to maintain its shape and function.
Wash Gently for Long Life
Hand wash your mask or use a delicate cycle with cold water to preserve the fabrics. Air dry flat to preserve elastic and prevent shrinking, and avoid fabric softener as it can degrade elastic over time.
Store Properly to Prevent Damage
Keep your mask in a clean drawer or pouch to protect it from dust and dirt. Do not fold it sharply as this can crease the shape and damage the internal structure. For travel, use a small breathable case to keep it safe.
Frequently Asked Questions About Making Sleep Masks
How long does it take to make a sleep mask?
A simple tie-strap mask takes about 15 minutes, while more complex designs with fusible fleece take up to an hour. Beginners should allow extra time for cutting and pressing fabric layers accurately.
What fabric blocks the most light for sleep masks?
Dark-colored cotton combined with one-sided fusible fleece blocks the most light effectively. Adding a layer of batting or using minky lining further reduces light penetration for total darkness.
Can I make a sleep mask without a sewing machine?
Yes, you can hand sew a sleep mask using a backstitch for durability, especially for attaching straps and closing openings. Hand sewing takes longer but yields a functional result if you lack a machine.
How do I stop my sleep mask from slipping off?
Adjust the elastic length to fit your head snugly, using 13½ inches for standard elastic or 16–18 inches for fold-over elastic. Ensuring the mask contours tightly around the nose bridge also helps keep it in place.
Is minky fabric too hot for a sleep mask?
Minky adds warmth, so it is ideal for winter, but you should pair it with breathable cotton on top to avoid overheating. For year-round use, lightweight flannel offers softness without trapping excessive heat.
Key Takeaways for How to Make a Sleep Mask
Creating your own sleep mask allows you to control light blocking, comfort, and fit exactly to your needs. By choosing dark fabrics, adding fusible fleece, and selecting the right strap method, you can build a mask that improves your sleep quality significantly.
Start with simple materials like cotton and elastic, then experiment with plush linings or decorative elements as you gain confidence. Gather your tools tonight and begin crafting a custom sleep solution that helps you rest better every night.