How to Fix Futon Springs
Is your futon sagging, squeaking, or feeling uneven when you sit or sleep on it? Chances are the issue lies in the springs, which can stretch, pop loose, or break over time. The good news is that you do not need to replace the entire futon to solve this problem. With basic tools and the right techniques, you can fix futon springs yourself to restore firm support.
This guide walks you through diagnosing spring problems, reattaching loose coils, restoring tension, and replacing damaged components. You will learn how to identify the exact issue, use the right tools safely, and apply professional fixes that last. Most repairs take under two hours and cost significantly less than buying new furniture.
Identify the Specific Spring Problem
Before grabbing your tools, you must confirm that the springs are the actual culprit. Misdiagnosing the issue as a spring problem when it is actually foam or frame damage leads to wasted effort and money.
Check for Sagging or Soft Spots
Press down firmly on different areas of the futon to feel for inconsistencies. If certain spots feel soft or collapse easily, it often indicates a spring issue rather than general wear. A general dip in the center usually means your coil springs have stretched out over time. A sharp, localized hole typically points to a dislodged or broken spring that has popped free.
Flip and Inspect the Frame Underside
Turn the futon over to access the underside and look for visible signs of failure. Use a flashlight to spot hidden damage like springs poking through the base fabric or hooks unattached from their clips. Look for visible gaps where springs should be anchored or twisted metal coils that have snapped. Pay close attention to the corners and center support beams where stress is highest.
Confirm the Spring Type in Your Futon
Futons typically use one of two spring systems, and repair methods differ for each. Coil springs are round, interconnected metal loops stretched across the frame. Serpentine springs are S-shaped metal wires running front to back, held in place by metal clips. Some systems use webbing instead, which requires a completely different fix, so verify your setup first.
Rule Out Foam and Frame Damage
If the springs feel firm but the seat still sags, the problem is likely compressed foam rather than the springs. Remove the cushion cover and press the foam directly to see if it rebounds. Also inspect the wooden frame for cracks, loose joints, or broken center supports, as a damaged frame will undermine any spring repair you perform.
Gather Repair Tools and Materials
Having the right tools on hand prevents frustration and ensures a clean, safe repair process. You need specific items to handle high-tension metal safely and effectively.
Essential Hand Tools for Repair
You will need standard pliers for gripping and rehooking springs, as well as vice grip pliers to compress stretched coil springs. A tack hammer is essential for securing clips without damaging the wood, while a staple gun helps reattach lining and dustcloth. Keep a screwdriver handy for removing screws and a spring hook tool for safely reattaching loose springs under tension.
Specialty Tools for Precision Work
For full spring replacement or installation, you may need a spring puller to stretch serpentine springs into place. Bolt cutters or an angle grinder are necessary for cutting metal springs to size, while a shop vise helps bend spring ends securely. A spring puller costs between $40 and $50 but can sometimes be improvised with rope and clamps in a pinch.
Replacement Parts Checklist
Buy only what you need based on your diagnosis, such as replacement springs that match your existing type. You will need metal spring clips for anchoring serpentine springs and upholstery nylon twine to tie springs together for even tension. Gather liner fabric or FLW for durable backing, dustcloth to protect the underside, and a 1×4 or 2×4 wood board for structural reinforcement.
Reattach Loose Futon Springs
If your springs are intact but unhooked, a quick reattachment can solve the problem without major reconstruction. This is the most common and easiest fix for futon owners.
Locate Detached Spring Ends
Flip the futon and find where springs have pulled free from their clips or frame hooks. Common failure points are near the front edge and the center support where tension is greatest. Identify if the clip itself is damaged or if the spring simply slipped out.
Rehook with Pliers or Spring Tool
Use pliers or a spring hook tool to grip the loose end of the spring carefully. Guide it back into the silent crosswire clip or frame anchor without forcing it, as bent metal can snap. If the clip is damaged, remove it with pliers and replace it with a new one, nailing it so it overhangs the frame by 1/8 inch.
Prevent Future Slippage with Twine
Even rehooked springs can come loose again, so lock them in place with upholstery nylon twine. Tie one end to the spring near the clip, loop the twine through adjacent springs, and staple the end to the frame. This creates an anchor system that distributes pressure and keeps springs aligned during use.
Restore Tension to Stretched Coil Springs
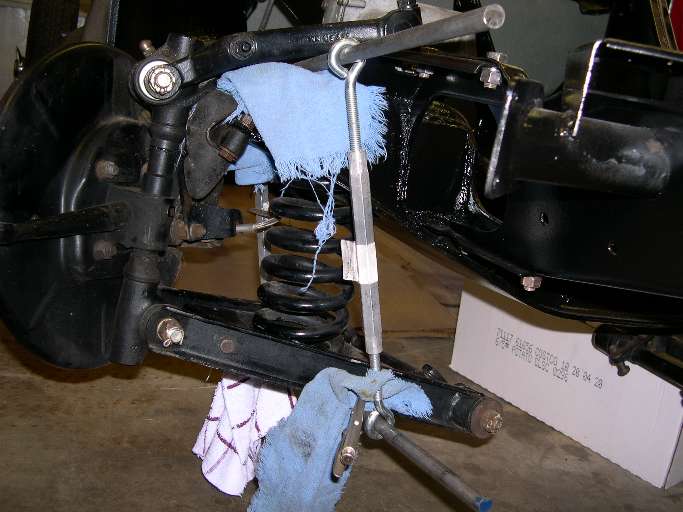
Coil springs lose elasticity over time, causing a soft, saggy seat that feels uncomfortable. You can revive them without full replacement by compressing the coils back to their original tension.
Expose the Spring Grid
Remove the bottom fabric liner by prying out staples with pliers to access the springs. Set the liner aside carefully so you can reuse it later after the repair is complete. This gives you full access to the grid of coil springs running across the frame.
Test for Stretch Rather Than Breakage
Press each coil to determine if it is stretched or broken. If a coil compresses easily and does not rebound, it is stretched and ready for tension restoration. If the metal is cracked or snapped entirely, you must skip to the replacement section.
Compress Springs with Vice Grips
Use vice grip pliers to squeeze individual coils and shorten the loop gently. Clamp the pliers around a stretched coil, close the jaws to compress it, then release and test the tension. Repeat this along the entire row, working slowly because over-compressing can weaken the metal.
Replace Serpentine Springs in No-Sag Systems
For broken or worn zig-zag springs, full replacement delivers long-term results and restores proper support. This process requires precision measurement and careful handling of high-tension metal.
Measure and Mark Clip Positions
Space your new springs 2 to 3 inches from the frame edge for proper clearance. Place them 8 inches apart to ensure even weight distribution across the seat. Avoid placing springs directly over center supports and mark clip locations on both front and back rails using a ruler.
Install Metal Clips with Proper Overhang
Center each clip over your marked position and nail it securely. Ensure the clip extends 1/8 inch past the frame edge to allow the spring to hook securely. Repeat this on the opposite side, ensuring front and back clips align perfectly for straight spring installation.
Cut Springs to Exact Length
Measure the distance between front and back clips and divide by 1.65, then round up to the nearest half-inch. This calculation gives you the number of loops needed for proper tension. Count the loops from the right end and cut with bolt cutters or an angle grinder while wearing eye protection.
Test Fit and Trim Gradually
Install one spring first by stretching it onto the back clips and using a spring puller to hook the front. Place a yardstick under the center to check that the spring sits 1 inch above the frame. If it is too high, trim half a loop at a time and retest until perfect.
Bend Ends for Secure Hooking
Use a vise and hammer to bend the cut ends of the springs into a small hook shape. This prevents slippage during use and ensures the spring stays seated in the clip. Install all springs one at a time, starting from the back and using the spring puller to maintain control.
Synchronize Springs with Twine Ties
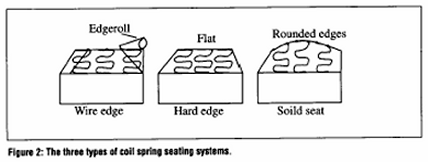
Untied springs move independently, leading to uneven wear and premature failure of your repair job. Tying them together balances the load across the entire seating surface.
Start the First String Line
Hammer a nail into the frame about one hand’s width from the front edge. Loop twine around it and staple in a Z-shape to lock it firmly in place before beginning your ties.
Knot and Tighten Properly
Use a simple over-under-through knot at each spring intersection to secure the line. Pull excess string through to keep it tidy and maintain consistent tension without distorting spring alignment. Hold the twine in your right hand, wrap over two fingers, pass under the spring, and pull with your left.
Add a Second Parallel String
Install a second line of twine one hand’s width back from the first line. Use wider loops to engage more springs and create a stable grid. If your twine runs out, tie a square knot and continue with a new piece to finish the job.
Reinforce Weak Frames and Replace Foam

Even perfect springs fail if the frame is weak or the foam is crushed beyond recovery. Address these structural issues to ensure your spring repair lasts.
Add Wood Support Beams
For persistent sagging, install a 1×4 or 2×4 wood board across the seat area. Cut it to fit between frame supports, position it perpendicular to the springs, and secure with screws. This adds rigidity but makes the seat stiffer, which is ideal for heavy use scenarios.
Repair Loose Frame Joints
If the frame wobbles, reinforce joints by applying wood glue to loose connections. Clamp them and let dry, then drive screws through for added strength. Take photos before disassembly if you need to remove parts to access difficult areas.
Replace Compressed Foam
Remove the cushion cover and peel off old foam that no longer rebounds. Install new foam by pushing it firmly into corners and stretching it taut across the frame. Re-lay batting and fabric smoothly, stapling from the center of each side outward to avoid wrinkles.
Install Liner and Dustcloth
Finish the repair with clean, protective covering to keep debris out and protect your work. This final step restores the professional appearance of your futon.
Staple Liner Fabric Tightly
Use FLW or heavy-duty upholstery scrap to cover the spring assembly. Stretch and staple the back edge first, then pull one side tight and staple, followed by the opposite side. Finish with the front edge and trim excess fabric for a clean look.
Attach New Dustcloth
Cut a piece of dustcloth to fit the underside and staple it tightly across the frame. This blocks dust and debris, protects springs from moisture, and restores a finished appearance. Reattach futon feet and return the unit to its place.
When to Call a Professional for Help
DIY works for most spring issues, but some cases need expert help to avoid injury or further damage. Know your limits before starting a complex repair.
Choose Professional Repair If
Call a pro if the frame is cracked or split, or if you are dealing with a reclining futon mechanism. Seek help if multiple springs are broken or corroded, or if you lack tools like a spring puller. Local furniture repair shops charge $50 to $100 for spring fixes and offer warranties on their work.
Frequently Asked Questions About Fixing Futon Springs
How much does it cost to fix futon springs yourself?
Most DIY repairs cost less than $50 in parts if you already have basic tools. You can save significant money compared to professional services or buying a new futon entirely.
How long does it take to replace futon springs?
A full spring assembly replacement typically takes about two hours for a beginner. Simple re-hooking jobs can be completed in under an hour with the right tools.
Can I fix a broken spring without replacing the whole system?
Yes, if only one spring is broken, you can replace just that single component. Match the old spring exactly by taking it to the store or measuring it precisely before ordering.
Why does my futon still sag after fixing the springs?
The issue might be compressed foam rather than the springs themselves. Check the foam cushioning and frame integrity, as these often cause sagging even with good springs.
What tools do I absolutely need to fix futon springs?
You need pliers, vice grips, a tack hammer, and a staple gun as minimum requirements. A spring hook tool and spring puller make the job much safer and easier.
Key Takeaways for Fixing Your Futon Springs
Fixing futon springs is a practical way to extend your furniture’s life without spending a fortune. By diagnosing the issue correctly, using the right tools, and following these steps, you can restore firm support for years to come.
Most repairs take under two hours and cost less than $50 in parts. Perform annual inspections to catch loose springs early and avoid major damage down the line.