Leather Seat Bolster Repair Guide
If your car’s leather seat bolster has sunk, cracked, or torn, you’re facing a common problem that affects almost every vehicle with age. Years of body weight, sun exposure, and daily entry/exit compress the foam core and stress the leather surface. A collapsed bolster creates poor lumbar support on long drives, while exposed fibers from tears invite rapid deterioration. The encouraging reality is that a thorough leather seat bolster repair can restore both the structural foam and the surface finish for a fraction of dealership costs. This guide covers diagnosis, foam rebuilding, leather patching, color matching, and long-term protection.
You’ll learn how to identify whether the problem is structural or cosmetic, rebuild collapsed foam using expanding spray and neoprene overlays, patch holes with sub-patches and flexible filler, and achieve a factory-quality color match. Whether you drive a vintage roadster or a daily commuter, these techniques deliver professional results with basic tools.
Diagnose Foam Collapse vs. Surface Leather Damage
Before purchasing supplies, determine what actually needs fixing. Many bolsters fail from the inside out, meaning the leather looks acceptable while the support underneath has disintegrated.
Identify Structural Foam Failure
Compare the damaged bolster to the opposite side of the seat. If it sits noticeably lower or feels soft and sunken under hand pressure, foam degradation is the root cause. Permanent deep creases that survive steam cleaning signal long-term compression. In older vehicles, foam can lose up to 1.5 inches of original height after 17+ years of use. When the leather remains intact but the shape is gone, the fix begins beneath the surface.
Classify Leather Surface Damage
Examine the leather closely to choose the right repair method:
- Minor wear: Fading or light scuffs respond to cleaning and conditioning alone.
- Moderate damage: Small cracks, holes, or frayed fibers need patching and filler.
- Severe tears under tension: If the tear widens when you sit, full panel replacement may outperform a patch.
Bolsters endure constant sitting pressure, so repairs require flexible adhesives and longer curing windows than low-tension areas.
Gather Tools and Materials for Bolster Restoration
Preparation prevents mid-project interruptions. Gather everything before disassembly.
Essential Chemicals and Consumables
| Category | Key Items |
|---|---|
| Cleaners | Alcohol cleaner, leather cleaner, steam cleaner |
| Prep Agents | Leather prep pad, leather binder |
| Adhesives | Flexible leather glue, contact adhesive, expanding spray foam |
| Fillers | Heavy leather filler, sub-patch fabric, 6mm neoprene |
| Finishing | Leather repair paint, protection cream, airbrush (optional) |
Required Tools
Cutting needs include a scalpel, scissors, serrated bread knife, and fine-tooth hacksaw. Application tools include a palette knife, wooden sticks, and a sponge. Mechanical work requires a Dremel with sander attachment, sanding block, and hog ring pliers. Safety and prep supplies include masking tape, rosin paper, a hairdryer, and gloves.
Pro Tip: Always test cleaners and paints on a hidden section first. Some leathers react poorly to alcohol-based solvents.
Rebuild the Collapsed Foam Core
Skip this section if your bolster holds its shape. Otherwise, restore the foundation before touching the leather.
Remove the Seat from the Vehicle
- Unbolt the seat using two 12mm front bolts and two 14mm rear bolts.
- Disconnect the seat belt warning connector before lifting.
- Separate the seat back by removing one 14mm nut on the left and two 16mm bolts on the right.
- Access note: The right-side bolts sit behind a plastic cover secured by two Philips screws and a pry-off handle.
- Flip the seat pan upside down and remove two 14mm nuts securing the rails.
Open the Leather Cover
Locate the hog rings along the bolster edge. About ten rings typically need removal for full access. Use pliers or a screwdriver to split each ring, then peel back the leather only as far as needed to reach the damaged zone. Keep original rings if you plan to reuse them.
Reinforce and Fill the Damaged Foam
- Inspect the foam for crushing, voids, or perished sections. Measure the height loss against the original contour.
- Create a temporary mold by wrapping FlexSeal tape or heavy-duty duct tape around the outer edge of the damaged area. Add masking tape on top if needed.
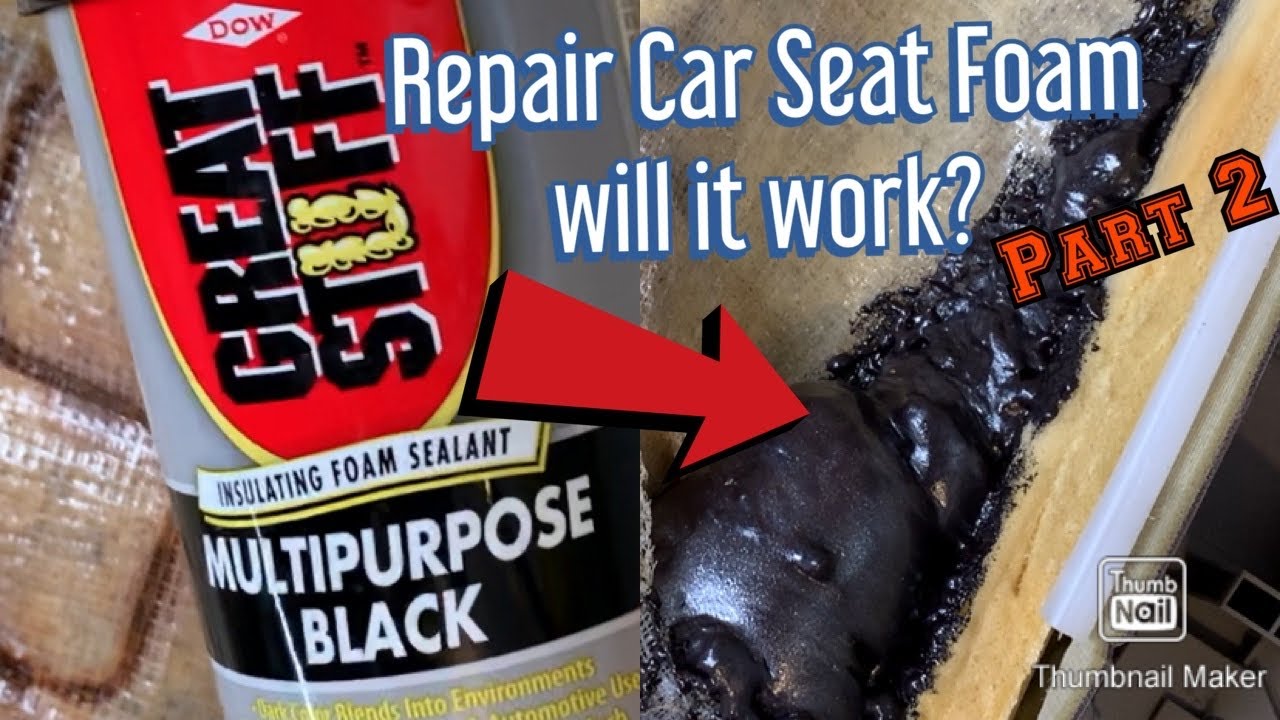
- Inject expanding spray foam into voids and torn sections. Use sparingly, as overfilling creates extensive trimming work.
- Allow 24 hours for full cure.
- Trim excess with a serrated bread knife or hacksaw.
- Shape the contour with a Dremel sander. Minor imperfections are acceptable because the leather will conform.
Add a Neoprene Smoothing Layer

Raw foam texture can telegraph through thin leather. Smooth this transition:
- Trace the bolster shape onto rosin paper to create a template.
- Cut 6mm neoprene fabric to match.
- Test fit and bevel the edges near the seam so padding stays invisible.
- Spray contact adhesive on both foam and neoprene surfaces.
- Wait 5 to 10 minutes for tack, then press together firmly.
- Trim the top edge with a razor blade for a seamless transition.
Repair Holes and Tears in the Leather

Only proceed once the foam is stable. If structural work is needed, complete that first.
Prepare the Surface Thoroughly
- Clean deeply with leather cleaner to remove dirt, oils, and old conditioner.
- Degrease with alcohol cleaner. Any residue prevents proper adhesion.
- Remove the factory topcoat by rubbing with a leather prep pad until the surface looks porous.
- Strengthen frayed fibers by applying leather binder in 2 to 3 layers, drying between coats.
Patch and Fill the Damage
- Trim loose leather lips around the hole with a scalpel to create a flush surface.
- Cut a sub-patch 2 cm larger than the hole.
- Slide the patch underneath using wooden sticks from a repair kit. Tuck all excess material beneath the leather.
- Apply flexible leather adhesive to the underside of the leather around the hole.
- Press firmly to bond the leather to the patch and wait 24 hours.
Apply Filler in Thin Layers

Thick applications shrink and crack. Build gradually:
- Use a palette knife to press heavy leather filler into the hole.
- Apply thin coats, smoothing each with the knife’s sharp edge.
- Dry each layer with a hairdryer before adding the next.
- Stop when filler sits just below surface level.
- Apply a final flush coat and account for slight shrinkage.
- Scrape stray filler before it cures and wipe the area with alcohol once dry.
Match and Restore the Leather Color
A flawless structural repair fails visually if the color is off. Precision matters here.
Understand Manufacturer Color Variance
Automakers frequently change dye formulations across model years, even within the same color code. For example, Honda S2000 Red shifted noticeably between 1999 and 2009, with darker shades early and lighter tones mid-cycle. Many suppliers list a single universal code that may not match your specific year.
Achieve a Perfect Color Match
- Pull a sample by removing a door card or cutting scrap leather from a hidden area.
- Send the sample to a specialty dye shop for a custom mix. This typically adds about $25 over standard kits.
- Test the paint on a hidden spot before full application to verify accuracy.
Paint and Finish the Repair
Blend the repair seamlessly into the surrounding leather.
Apply Leather Paint in Layers
- Rub the first coat of repair paint into the area with a sponge, working it into grain and creases.
- Switch to an airbrush for subsequent coats to achieve a smoother, less visible finish.
- Apply 3 to 5 thin layers, drying fully between each. Deeper damage requires more layers.
Cure and Protect the Finish
- Wait 28 hours before sitting on the seat. Flexing uncured paint causes cracks.
- Wait 4 days before applying any conditioner.
- Apply protection cream to seal the repair and prevent future fading.
Pro Tip: Steam clean the entire seat after reassembly. The heat and moisture relax compressed leather and reduce old creases.
Reassemble the Seat Correctly
Put everything back together with attention to alignment.
Reattach the Leather Cover
- Pull the leather snug over the rebuilt bolster.
- Check for wrinkles or tension points before securing.
- Fasten with new hog rings using hog ring pliers. Zip ties work temporarily but lack long-term durability.
Reinstall Seat Components
- Reconnect the seat rails with 14mm nuts.
- Reattach the seat back using the 14mm nut on the left and 16mm bolts on the right.
- Snap the plastic side panel and pull handle back into place.
- Verify rail alignment by flipping the seat and counting notches from the front of the seat lock to the front of the rail. Both sides must match exactly to prevent binding.
Prevent Future Bolster Damage
A repaired bolster can last for years with consistent care.
Follow a Maintenance Routine
- Clean monthly with a pH-balanced leather cleaner.
- Condition every 3 to 6 months to restore oils and prevent cracking.
- Park in shade or use a windshield sun shade to reduce UV exposure.
Know When Replacement Beats Repair
Some damage exceeds what patching can address:
- Large tears crossing high-stress seams
- Extensive foam disintegration with no structural base
- Leather delamination where layers peel apart
In these cases, full seat reupholstery delivers better long-term results.
Troubleshoot Common Bolster Repair Problems
| Problem | Likely Cause | Solution |
|---|---|---|
| Peeling repair | Poor prep or grease residue | Degrease with alcohol and abrade the topcoat |
| Filler cracks | Thick application without layering | Sand down and reapply in thin coats |
| Visible texture | Rough foam showing through leather | Add neoprene overlay and sand smooth |
| Wrong color | Fading or incorrect dye | Use custom-matched paint and test first |
| Wrinkles remain | Leather memory from compression | Steam clean and accept some permanent creasing |
| Seat won’t slide | Rail misalignment | Count notches and ensure even positioning |
Frequently Asked Questions About Leather Seat Bolster Repair
How do I know if my seat bolster problem is foam or leather?
Compare the bolster profile to the opposite side. If it sits noticeably lower or feels sunken under pressure, foam collapse is the issue. If the shape looks correct but you see cracks, holes, or fraying, the damage is surface-level. Many bolsters suffer from both simultaneously.
Can I repair a sagging leather seat bolster without removing the seat?
Minor surface repairs work fine with the seat installed. However, rebuilding collapsed foam requires peeling back the leather cover, which means removing the seat for proper access and working space. Attempting foam repair in the car usually produces poor results.
How long does a leather seat bolster repair last?
Properly rebuilt foam with neoprene overlay and correctly applied leather repair can last for years. The key factors are thorough surface preparation, flexible adhesives, adequate curing time, and consistent conditioning afterward. High-tension areas like bolsters need more attention than low-stress panels.
What causes leather seat bolsters to collapse?
The primary causes are repeated body weight compression over years, foam material breakdown from age and heat, and loss of structural integrity in the foam cell walls. UV exposure and dry leather accelerate the process by reducing elasticity in both the foam and the leather cover.
Is it cheaper to repair or replace a leather seat bolster?
DIY repair typically costs under $50 in materials, while professional foam replacement or full seat reupholstery can exceed $250 to $800. For bolsters with intact leather and only foam collapse, repair delivers excellent value. For extensive leather damage combined with foam failure, replacement may be more practical.
How long does leather filler take to dry between layers?
Each thin layer typically dries within 10 to 20 minutes when accelerated with a hairdryer, though full curing takes 24 hours. Applying thick layers to speed up the process causes shrinkage and cracking. Patience during this stage produces a much smoother final result.
Key Takeaways for a Lasting Leather Seat Bolster Repair
A successful leather seat bolster repair depends on addressing both the structural foam and the surface leather in the correct order. Start with diagnosis to confirm whether foam rebuilding is needed, then restore the core using expanding spray foam and a neoprene smoothing layer. Patch surface damage with sub-patches and flexible filler applied in thin coats, then match the color precisely using a custom-mixed dye. Allow full curing time before use and protect the finish with conditioner.
The most common mistakes include rushing surface preparation, applying filler too thick, skipping the neoprene overlay, and using a generic color that doesn’t match the year-specific dye. Avoiding these pitfalls produces a repair that looks and feels factory-original. Gather your materials, set aside a full weekend, and your bolster will provide years of comfortable, like-new support.