How to Assemble a Wooden Futon
Staring at a pile of wooden boards and mysterious hardware can make you wonder if you will ever figure out how to assemble a wooden futon. You are not alone in feeling overwhelmed by the various bolts, dowels, and rollers that come in the box.
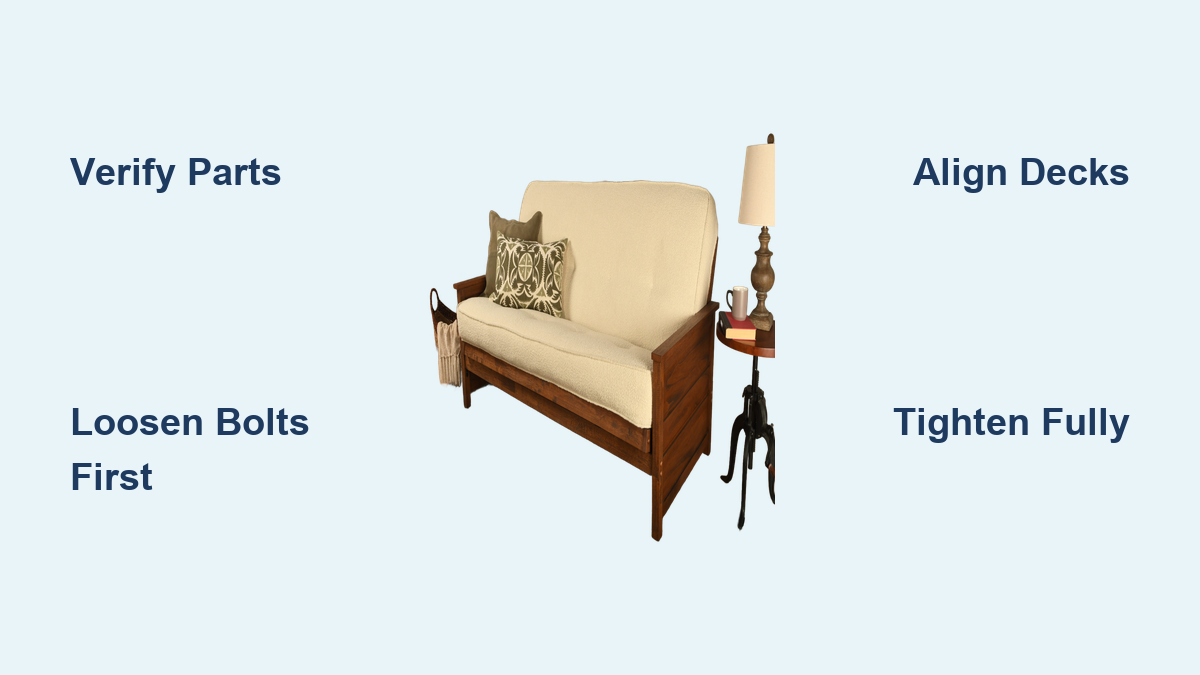
This guide breaks down the entire process into clear, manageable steps so you can build a sturdy frame in under two hours. You will learn exactly how to verify parts, connect the decks, and tighten joints for long-lasting durability.
Verify All Parts and Tools Before Starting
Skipping the inventory check is the fastest way to encounter missing pieces halfway through your build. Lay every item out on a clean, soft surface to prevent scratches while you organize.
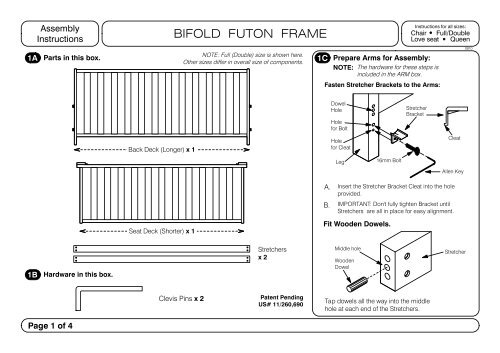
Check the Standard Components
Ensure your kit includes these specific items before beginning assembly:
* 2 arms (left and right side supports)
* 2 stretchers (front and back horizontal bars)
* Back deck (includes rails, end caps, and slats)
* Seat deck (includes rails, end caps, slats, and stoppers)
* Rollers (long oval for vertical grooves, round for horizontal grooves)
* Hardware pack (60mm and 30mm bolts, barrel nuts, thumb nuts, dowels, washers, clevis pins)
* Plastic runners and foot connector bar
* Gripper (mattress snapper) and wood buttons
* Allen key (included tool)
Gather Required Tools
You primarily need the included Allen key, but a few extra items help significantly:
* Power driver (set to low torque only)
* Double-sided tape (for securing loose wood buttons)
* Two people (essential for lifting heavy decks safely)
Warning: Never use high torque settings on wood screws. Over-tightening strips the threads and weakens the joint permanently.
Build the Frame by Attaching Arms and Stretchers
The foundation of your futon relies on the arm-stretcher frame. Proper alignment here prevents binding issues when you convert the furniture later.
Identify Front Versus Back Orientation
Locate the strike plate on the stretcher to identify the front of the futon. Confirm the storage pouch is attached to this front stretcher, as it will hold your tools once assembly is complete.
Assemble Using the Bolt-and-Barrel Nut System
Most wooden frames use this standard connection method for stability.
- Insert 4 dowels (two per end) into both stretchers so they align with arm holes.
- Position one arm upright and align the stretcher dowels with the corresponding arm holes.
- Insert a long bolt through the joint and secure it with a barrel nut.
- Ensure the barrel nut hole faces inward to allow proper bolt insertion.
- Repeat this process for the second arm.
Critical Detail: Leave these joints slightly loose with about ¼ inch of play. Tightening them fully now will cause misalignment when you insert the decks later.
Construct the Back and Seat Decks

The decks form the platform for your mattress. Correct assembly ensures both stability and smooth movement between positions.
Assemble the Back Deck
Use the two longest rails for this section. The end caps feature a notch that must face upward during installation.
- Insert 8 dowels into the back deck end caps.
- Slide the end caps into the rails.
- Insert 4 barrel nuts into the rail holes.
- Drive 4 × 60mm bolts through the end caps into the rails.
- Fully tighten all bolts before proceeding.
Install Back Deck Slats
Slat size depends on your frame dimensions. Full-size frames use smaller slats while Queen-size frames use standard slats.
- Place slats with the countersunk hole facing up.
- Secure each slat with 30mm bolts.
Time-Saver: Hand-start all slat bolts first. Then use a power driver on a low clutch setting to snug them, finishing by hand to prevent over-tightening.
Assemble the Seat Deck for Smooth Conversion
This deck converts from a couch seat to a bed base, so orientation matters immensely for function.
Identify Seat Deck Parts
Use the two shortest rails for this section. The end caps have a plastic stopper on the bottom that must face down and forward.
Assembly Steps
- Insert 8 dowels into the seat deck end caps.
- Fit them into the rails with holes facing upward and inward.
- Insert 4 barrel nuts into the rails.
- Secure with 4 × 60mm bolts and tighten fully.
Attach Seat Deck Slats
- Full-size: Use larger slats.
- Queen-size: Use standard slats.
- Ensure the countersunk hole faces up.
- Fasten securely with 30mm bolts.
Visual Check: When complete, the plastic stopper should point toward the front. This engages the couch lock mechanism correctly.
Connect Back and Seat Decks Together
This step creates the hinge that allows your futon to convert between couch and bed modes easily.
Gather Required Hardware
Collect these specific parts for the connection:
* 2 × long clevis pins
* 2 × plastic runners
* 4 × short sleeves
* 2 × washers
* 2 × locking pins
Step-by-Step Connection Process
- Lay both decks flat with the back deck notch up and seat deck stopper down.
- Slide the seat deck end into the back deck pre-drilled holes.
- Rotate side feet upward to allow pin insertion.
- Insert the plastic runner small end into the seat deck.
- Slide 2 short sleeves onto a clevis pin.
- Pass the pin through the runner, sleeves, and both deck holes.
- Add a washer and secure with a locking pin.
- Repeat on the other side.
Success Signal: Both decks should now pivot smoothly. Test the movement before proceeding to the next step.
Install the Foot Connector Bar
This bar stabilizes the futon in bed mode and locks the feet in place during couch use.
Attach the Bar Securely
- Lift the seat deck until it locks upright against the back deck.
- Ensure the side without the metal insert faces you.
- Connect the bar to the seat deck feet.
- Insert 4 × 60mm bolts through the bar and feet.
- Tighten fully once all bolts are seated properly.
Function Check: In the bed position, the feet should angle slightly forward and remain stable without wobbling.
Insert Decks Into the Frame Assembly
Now comes the most critical step that requires two people to execute safely and correctly.
Position and Insert the Decks
- Hold the connected decks at 90 degrees to each other.
- Insert them into the inside of the arms and stretchers.
- One person holds the deck assembly while the other guides plastic runners into the grooves inside the arms.
- For Gold Series models, guide the top roller into the “seahorse track” by lifting slightly for alignment.
- Push the decks fully to the back of the arms.
Troubleshooting Tip: If you feel resistance, check that rollers are in the correct grooves and that initial arm joints were left slightly loose.
Perform Final Tightening
Secure the entire structure now that alignment is complete:
* Fully tighten all stretcher-to-arm bolts.
* Tighten stretcher support brackets.
* Confirm there is no wobble or looseness in any joints.
Durability Tip: Re-check bolt tightness after 2–3 weeks of use since wood can settle over time.
Add Finishing Touches for Stability
Make your futon safe, stable, and polished with these final adjustments.
Install Mattress Gripper and Strips
Insert the rubber snapper into the slot on the seat deck to prevent mattress slippage. For heavy mattresses, consider adding Strata strips:
* Cut a strip to match slat length.
* Peel backing and press firmly onto every other slat.
* Trim excess and repeat on back and seat decks.
Attach Conversion Strap
If your kit includes a strap, clip it to the back deck. Use it to assist lifting when converting, which is especially helpful with heavy mattresses.
Insert Wood Buttons and Store Tools
Complete the clean look of your new furniture piece.
Secure Wood Buttons
Push buttons into arm buttonholes and visible bolt heads on decks. If buttons fall out:
* Apply double-sided tape to the base before inserting.
* Use painter’s tape as an alternative adhesive.
Store Assembly Kit
Place the Allen key and instructions in the plastic pouch under the seat deck or on the front stretcher. Keep instructions for future disassembly or troubleshooting needs.
Learn to Convert Bed to Couch
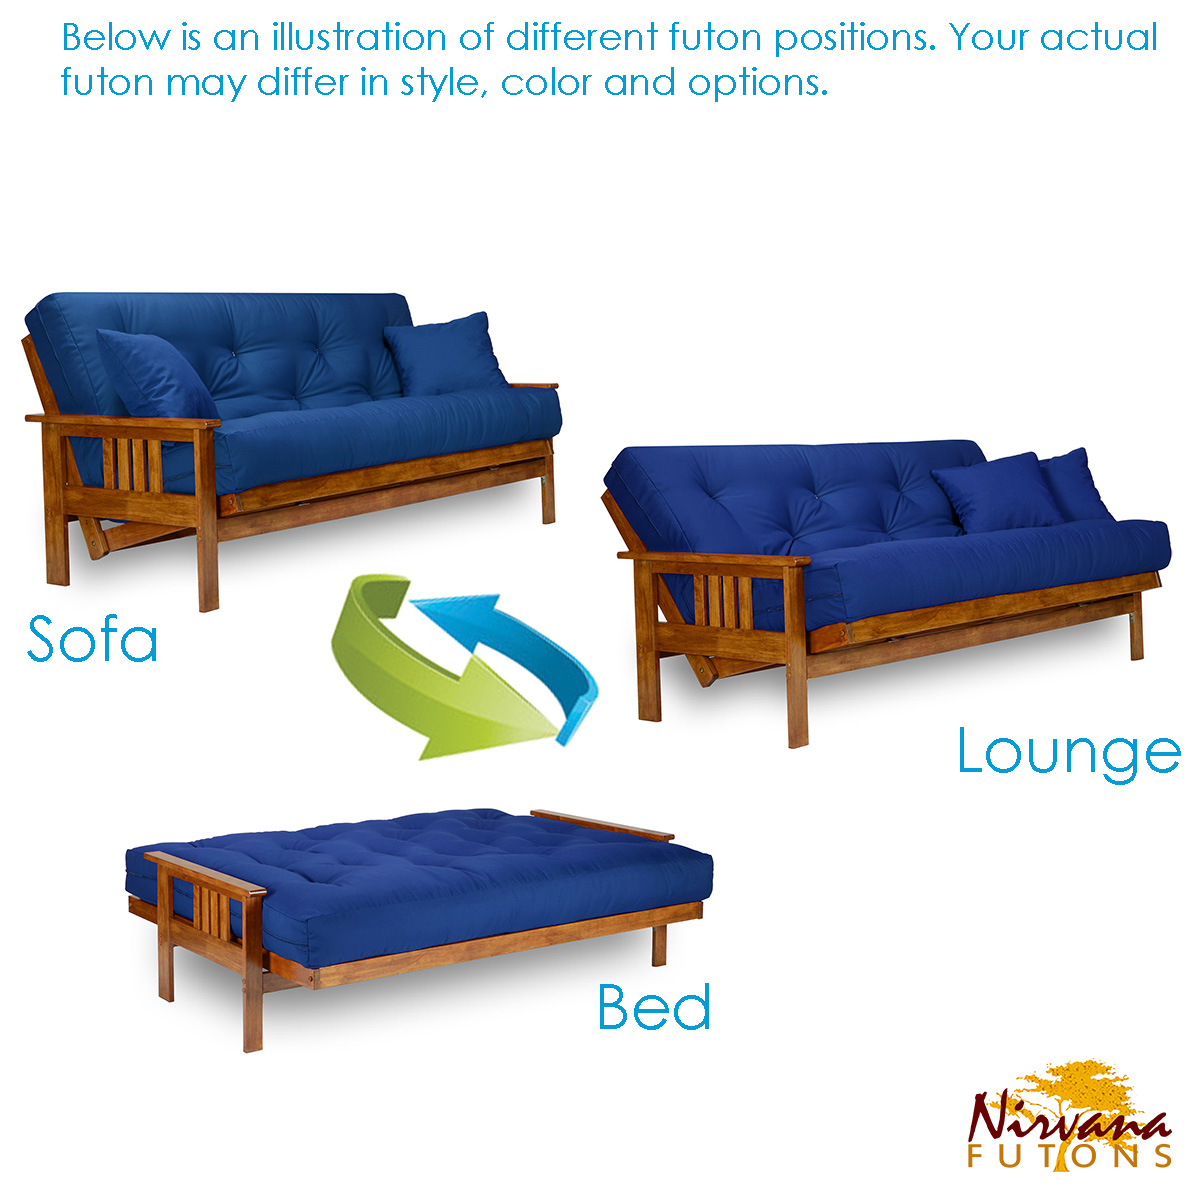
Master the transformation for daily use to ensure longevity of the mechanism.
Convert to Bed Position
- Lift seat deck to a vertical position.
- Pull foot connector bar toward you to release feet from the notch.
- Lower seat deck until flat.
- Ensure feet rest at a slight forward angle.
Convert to Couch Position
- Lift seat deck up and back until perpendicular.
- Push back to reinsert the foot connector bar.
- Lock feet into the back deck notch.
- Push seat deck down and forward.
- The back deck rises into the couch position.
Heavy Mattress Hack: Pull on the conversion strap to reduce strain during this process.
Maintain Stability and Performance Long Term
A well-assembled futon lasts decades with minimal care and attention.
Monthly Maintenance Checklist
- Tighten all bolts, especially stretcher and deck joints.
- Clean grooves and runners to remove dust or debris.
- Lubricate rollers lightly with dry silicone spray if movement feels stiff.
- Inspect gripper and straps for wear.
Troubleshoot Common Issues
- Deck Won’t Slide: Check roller placement (oval in vertical, round in horizontal) and confirm initial looseness was maintained.
- Mattress Slides: Install Strata strips on alternating slats and ensure the gripper is seated.
- Wood Buttons Fall Out: Use double-sided tape before insertion.
- Frame Feels Wobbly: Re-tighten stretcher bolts and verify the foot connector bar is secure.
Frequently Asked Questions About Assembling a Wooden Futon
How long does it take to assemble a wooden futon?
Most people complete the assembly in under two hours with two people. Having a helper makes lifting the decks and aligning arms much easier and safer.
Do I need special tools to build a wooden futon?
You only need the included Allen key. A power driver with a low torque setting can speed up slat attachment, but avoid high torque to prevent stripping wood threads.
Why should I leave bolts loose during initial assembly?
Leaving about ¼ inch of play allows the frame to align correctly when you insert the decks. Fully tightening early causes misalignment and makes final assembly impossible.
What if my wood buttons keep falling out?
Apply a small piece of double-sided tape or painter’s tape to the base of the button before pushing it into the hole. This adds necessary friction to hold them in place.
How do I stop my mattress from sliding on the futon?
Install the included rubber gripper in the designated slot. For extra stability, add Strata strips to every other slat to increase friction between the mattress and frame.
Key Takeaways for Assembling Your Wooden Futon
Successfully learning how to assemble a wooden futon requires patience, proper part verification, and strategic tightening. Leaving joints slightly loose during the initial frame build allows for perfect alignment when inserting the decks later.
Always finish by fully tightening all bolts and checking that rollers sit in their correct grooves. Regular maintenance ensures your futon remains sturdy and converts smoothly for years to come. Start your build today with confidence using these proven steps.